Meta Talismans: Difference between revisions
No edit summary |
|||
| Line 63: | Line 63: | ||
== Phylactery of Resilience == | == Phylactery of Resilience == | ||
[[File:defencetali.png]]The Phylactery of Resilience, informally known as the Defence Talisman, offers increased protection from melee and magical damage from creatures. There are ten levels of the talisman and on average you gain 5% protection per level. | [[File:defencetali.png]]The Phylactery of Resilience, informally known as the Defence Talisman, offers increased protection from melee and magical damage from creatures. There are ten levels of the talisman and on average you gain 5% protection per level. | ||
=== Levelling === | === Levelling === | ||
Revision as of 12:59, 3 January 2017

Description
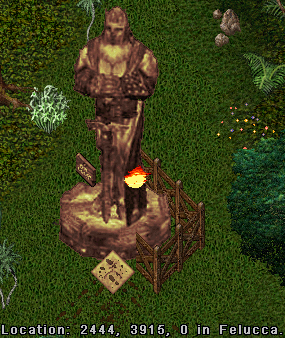
The Meta Talisman is a wearable item obtained by completing a quest line which begins at a mysterious Ancient Statue of Power near Valor Shrine. The Meta Talisman gives warrior, archer, and mage style players special abilities as their talisman levels. Each talisman has a passive property and active abilities that are obtainable through relics. The talisman levels up as you kill creatures and the abilities of your talisman become stronger.
With these bonuses come some limitations:
- The talisman cannot be equipped by any character with greater than 50 musicianship or greater than 50 taming.
- Upon equipping a talisman there is a fifteen minute cool down before the skills or bonuses become active. To avoid this cool down, you can return to the Ancient Statue of Power and speak the words "I wish to pay tribute".
- There are armor and distance restrictions for each type. This are detailed further below for each type of talisman.
- The talisman skills and bonuses are not applicable against other players or pets.
- Talisman experience and relic ability gains are not possible in houses.
- There is a maximum experience amount per creature that can be awarded to a given talisman. The bigger the creature, the greater the experience!
Relics and Abilities
Abilities are applied to the talisman by finding relics at events, dungeon bosses and at the Arch Demon boss. Each talisman has a maximum of four relic slots and an aesthetic relic slot. The aesthetic slot is usable at any time and you get relic slots at levels: 1, 4, 7, 10.
There are currently four unique relics for each type of talisman which are detailed further below. Each relic has ten levels and leveling may lower the skill cooldown, raise the chance to activate, or provide other ability specific bonuses. These abilities typically have a random chance to activate on damage and a cooldown to only allow them to be activated at certain intervals.
To add a relic to your talisman, double click the relic and then select your talisman. Be sure to stand in a safe place while doing this as relics can be stolen!
To remove a relic, double click your Meta Talisman and then click on the [ - ] symbol next to the relic you wish to remove. Do so with caution, however, as the relic is then gone forever. This option is to allow one relic to be removed so another can take its place.
Idol of the Magi

The Idol of the Magi, informally known as Meta Mage, provides a spell damage bonuses and mana cost reduction for offensive spells against creatures. The ten levels of the talisman average a 20% bonus per level. The mana cost reduction is calculated by the talisman level, number of relics applied, and spirit speak.
Levelling
While levelling, your talisman experience gains are reduced if you are wearing armor. The penalty is 1.6% per AR. There is however no range penalty for Meta Mages. You can therefore stand at a safe distance while firing your lightning bolts at those big ugly creatures!
Spirit Speak
Spirit Speak reduces the cost of spells. With the talisman at level 10 with four relics applied an energy bolt will cost as little as 10 mana with 100 Spirit Speak, 14 mana with 50 Spirit Speak and 16 mana with 0 Spirit Speak.
Relics
- Dispersion
- Dispersion provides a chance for spell damage to be dispersed to nearby enemies. There is a 10% chance for an offensive spell to damage level-dependent number of creatures within a 3 tile radius. At level one, the damage can disperse onto one additional creature and the cool down is 60 seconds. At level ten, the damage can spread to up to ten additional creatures and the cool down is 45 seconds.
- Focus
- Focus provides a chance for increased spell damage. Spell damage can do (Focus Level / 20) additional damage to the target creature. For example, at level 1, this would be 0.05% (1/20) additional damage. An offensive spell that hits for 100 will therefore generate an additional 5 damage, shown as a separate damage number. In the same scenario, at level 10, focus can generate an additional 50 spell damage. The cool down at level 1 is 60 seconds.
- Shadow Disciple
- Shadow Disciple provides a chance to return some mana and temporarily lower the resist of creatures that are casted upon. Mana recovery is calculated by: (damage * (10.0 + (Level * 2.0)) / 100.0). The resist of the target is modified by: resist * (1.0 - (((Level * 2) + 10.0) / 100.0)).
- Vivify
- Vivify provides a chance to enhance the skills and stats of an 8th circle creature summon. This applies to summoned daemons and elementals but not to energy vortexes or blade spirits. At level 1, vivify can be triggered every 60 seconds there is a 60% chance to summon an enhanced creature. Stats for the creature are scaled by 1.0 + (Level / 35.0) and skills are scaled by 1.0 + (Level / 20.0). Any creature that receives the bonus is given a new metallic hue.
Tips, Tricks and Templates
When completing the initial quest line, you may want to consider switching your character to a warrior or tank mage to complete killing the 100 evil creatures. Even with slayer spell books, killing the evil creatures as a pure mage can be somewhat laborious as you cannot use summons to help you.
The Meta Mage is arguably the most laborious of all the talisman. You should therefore make best use of all things that improve levelling efficiency:
- Don't wear any or very minimal armor. Leather bought from NPCs with slayer properties applied will provide the best balance for damage mitigation and experience gains.
- Level up Spirit Speak to 100 for spell cost reduction.
- Use Slayer Spell books to increase spell damage and therefore experience gains.
- Apply the Shadow Disciple relic first as it provides both increased damage and returns mana.
- Kill the biggest creatures you can find. If you are struggling, ask a friendly tamer or bard if you can follow them around and cast spells on the creatures they are killing.
Common templates are:
- Magery, Evaluating Intelligence, Healing, Anatomy, Spirit Speak, Meditation, Resisting Spells - This provides defensive wresting through Evaluating Intelligence and Anatomy, allows bandages to be used to heal and therefore save mana and Spirit Speak to conserve mana. Resisting Spells is useful to mitigate interruptions from poisons and paralyze spells.
- Magery, Evaluating Intelligence, Spirit Speak, Wrestling, Inscription, Meditation, Resisting Spells - Inscription lets you craft your own slayer spell books and number of spells that can be reflected with the Magic Reflection spell.
Phylactery of Resilience
 The Phylactery of Resilience, informally known as the Defence Talisman, offers increased protection from melee and magical damage from creatures. There are ten levels of the talisman and on average you gain 5% protection per level.
Levelling
You gain experience with this talisman by doing damage to creatures. The amount you gain is penalized by wearing too little armor. To ensure maximum experience gains, keep your armor at or above 80. The amount of experience gained is also affected by distance from the creature. The penalty is 20% for each tile beyond 1.5. Stay close, be well armored and crush those evil creatures!
Arms Lore
The wielder of an active Phylactery of Resilience or Totem of the Berserker with 100 Arms Lore and 100 Weapon Skill receives an increased Minimum Hit Chance. Against a creature with 100 wrestling, a normal warrior with 100 Weapon Skill has a 50% chance to hit the creature. With the talisman and 100 Arms Lore, this increases to ~63%. Note, however, that this does not raise your Hit Chance by a flat amount it just raises it to ~63% if you are currently below that. If you intend to kill only lowly ogres and ettins, you can probably skip Arms Lore. If however you want to take on bigger monsters such as with 100 or greater wrestling, such as dungeon bosses, then consider fitting this into your template.
Relics
- Leech
- This ability allows the player to sap small amounts of health from nearby creature when damaged. Every 30 seconds there is a chance to steal health from all the creatures nearby when struck and heal the wielder. The amount per creature is capped at the skill level and is a random value from 1 to skill level. Chance to activate and cooldown are affected by gaining levels.
- Quench
- Chance to resist firebreath. Every 90 seconds this has a 20% chance to give firebreath immunity when struck by firebreath. The duration lasts for (level * 5) seconds. The cooldown decreases by 90 - (Level * 2)
- Recoil
- The damage done to a player has the chance to reflect back on the attacker instead of causing damage. Every 30 seconds there is a 25% chance to turn an opponent's attack onto him.
- Remedy
- Chance to resist poison from a melee hit, such as a scorpion's sting. Every 80 seconds there is a 25% chance to become immune to poison for (level * 4) seconds. The cooldown deacrease by 90 - (Level * 3).
Totem of the Berserker
 The Totem of the Berserker, informally known as the Berserker or Zerk Talisman, provides offensive damage bonuses for melee skills, including archery. There are ten levels of the talisman and on average you gain 5% damage per level.
Levelling
The more armor you wear, the less experience you gain for damaging creatures at a rate of 1% per AR. As with the Defence Talisman, there is a distance penalty on experience gained of 20% per tile beyond 1.5 tiles.
Arms Lore
Arms Lore has the same effect Minimum Hit Chance increease for the Totem of the Berserker as it does for a Phylactery of Resilience Talisman. Further details are provided in the Phylactery of Resilience section.
Relics
- Double Strike
- When invoked the berserker will double swing on the creature. Does an instant swing following a normal swing provided you are within 5 tiles and starts with a 25% chance to activate with a 30 second cooldown. The damage is recalculated for the second strike so the damage number will almost certainly differ. Leveling this skill lowers the cooldown and increases the chance of activation.
- Infected Wounds
- When using a poisoned weapon, if an attack successfully poisons a creature the poison will be incurable (this does not apply to pets). If the user is carrying poison potions they have a chance to use that level of poison to infect creatures that they are attacking. This works with any weapon including two handed weapons. The poisoning skill gives a bonus to the number of infections per poison potion consumed. It also gives a chance that the poison is upgraded one level making lethal poison a possibility.
- Phase Shift
- Upon attacking a creature the berserker has the chance to to a teleporting attack to nearby creatures. The hiding and stealth skills are taken into account when performing this attack. It also uses stamina for each leap. Allows the activator to teleport to a creature or multiple creatures from a distance and hit them. The cooldown starts at 60 seconds but has a guaranteed activation on attack. The target must reside on a tile that can be walked on and more than 7 tiles away. The skills receives an additional phase jump for every other level gained for a maximum of 3 and each shift consumes 10 stamina. The damage per creature is lowered by dividing by the number of phase jumps being performed. Each level lowers the cooldown. 100 hiding and stealth will provide 50% bonus damage when phase shifting while hidden.
- Tread
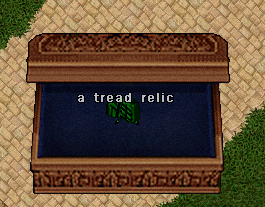
- The berserker can trample an enemy either on foot or while mounted. Full stamina is required and the weight of the character is taken into account. Damages creatures when pushing them out of the way. The more weight a character is holding, the more damage is done. 300 stone is considered full weight. The standard pushing mechanic remains which means this skill requires full stamina. The damage can be quite good at top level with a maximum of 300. The cooldown starts at 30 seconds and lowers while the chance to activate starts at 20% and increases.
Quest Line
Be forewarned, the quest to obtain a Meta Talisman is not for the impatient, frugal or faint of heart! You may complete the quest multiple times on one character but you will only be able to wield one talisman at a time.
To begin the multi-part quest you must travel just west of the Valor Shrine where there is a tall statue:
1. Beginning the quest: Stepping in front of the statue and speaking out loud will offer a quest gump.
2. A dull stone: Accepting this quest will give you with a dull stone that must be empowered with Vanquishing weapons. The absorb a Vanquishing weapon into to the stone, double click it and target the weapon. The stone can only be charged with true instruments of war. Daggers, knives and pitchforks cannot power it. After 30 Vanquishing weapons have been absorbed by the stone, you can return to the statue.
3. Evil creatures: Speaking to the statue again will empower the stone, opening the second part of the quest. You must now kill 100 "evil" creatures. These creatures must have a minimum fame level to be accepted by the stone. Creatures of this stature include Dragons, Drakes, Daemons, Ogre Lords, Lich Lords, Deep Earth Elementals, Orc Mine Overseers, Paragon Lichs etc. Note that you will have to kill these creatures by yourself. Once you've killed those creatures and the stone is filled, return to the statue and speak again.
4. Daemon archlord: Now you have to kill the Daemon Archlord, also known as the Arch Demon, he is located in Wrong on level 3. You need only hit him once but you must be in the same room when the demon is killed to be rewarded with a vial of his blood. Use the stone on it on this vial to purify it and then return to the statue.
5. Choosing your talisman: Speak once more to the statue with your purified stone and you will be able to choose one of the three talismans. Choose wisely!

