New Player Guide
Introduction
Welcome to UO Forever (UOF)! This brief guide is to get your started whether you’re a new player to UO, a returning veteran needing a refresher, or familiar with UO but it’s your first time playing UOF.
Video Guides for First Time Players
If you're BRAND NEW to UO, take 15 minutes to learn the absolute basics of the user interface and core mechanics. It will make the game far less confusing.
User Interface Guide: https://youtu.be/RlgEZF0QW4k
How to Play Ultima Online (Core Mechanics) Guide: https://youtu.be/nufU3pF2ar4
Getting Started
As a new player, you'll be granted Young Player Status. This gives you special access to the Young Player Dungeon as well as other features. We highly recommend you review the Young Player Status page to learn more.
Part of the fun of Ultima Online is exploring the open world. However, sometimes you need a little help finding that specific vendor or location.
The World Map is an excellent page that gives you an overview of all of Sosaria including towns, dungeons, and Moongate locations. We recommend sticking around Britain until you get more comfortable with the map.
Recommended Beginner Build - Dexxer/Archer Bard
UOF is an open ended adventure with endless possibilities; however, to put the best foot forward we would recommend starting your journey with a recommended build for a few reasons:
- They help you get the feel for UOF with a clear cut plan
- Progress is consistent and feels rewarding
- They provide good, steady income to fund future builds
We encourage players to forgo creating PvP or crafting characters initially as they require a steady source of income to fund gameplay.
Intro
A bard build is highly recommended for beginners as it is extremely safe and efficient at killing mobs. You’ll use the power of provocation to trick creatures into fighting each other and then finish the surviving foes off with your combat skills. Healing is used to recover hp, cure poison, and potentially resurrect an ally (NOTE: you need 60 Healing and Anatomy to cure poison and 80 in both to resurrect).
For your combat skill - Archery is the recommended skill to choose as it provides the safest option for new players. You can absolutely choose swordsmanship but it comes with higher risk as you'll take more damage while killing monsters. The payoff is your DPS will be higher. Again if its your first time playing UOF, we recommend choosing the Archer route. You can always respec your character to swordsmanship later if it doesn't feel like it fits your style.
Starting Skills
- 50 Archery or Swordsmanship (Archery Recommended)
- 50 Healing
- 20 Tactics
- 0 Anatomy
Final Build
- 100 Musicianship
- 100 Provocation
- 100 Healing
- 100 Anatomy
- 100 Combat Skill & Archery
- 100 Tactics
- 100 Magery
Final Stats
- 100 Strength
- 25 Intelligence
- 100 Dexterity
Getting Started
Congratulations on making your first character! You’ll start with a katana or bow & arrows and 150 bandages. Head to West Britain Bank (WBB) and open your bank by standing near a banker and type “banker bank”. WBB is located West of where you start. You can access your map by clicking on the World Map button on the toolbar at the top of your screen.
Deposit your 500 gold to keep it safe. Inside the bank is a blue Welcome Bag which has a full set of leather armor which you should equip. Now its time to head to the Bowyer to purchase some extra arrows if you started with Archery or to the Blacksmith to get a heater shield if you started with Swordsmanship.
-
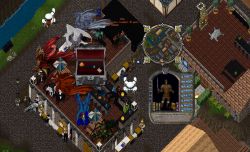
West Britain Bank

The blacksmith located north east of WBB. Once you have your heater shield you'll have 36 armor and its time to head to the Young Dungeon.
-
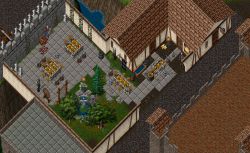
Britain Blacksmith
-
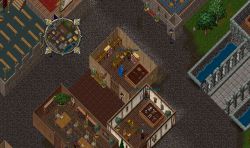
Britain Bowyer


The Young Dungeon is located just outside the inn you left when you first created your character.
-
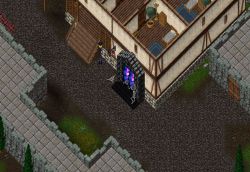
Young Dungeon Entrance

Life is going to be a little rough for a bit but it gets much easier as you progress - which should happen quickly. Having low combat skills, tactics, anatomy & strength makes your damage really low. Your attack speed will also increase as you gain more Dexterity. Finally, expect to fail bandages a lot until you gain more healing and anatomy.
Start attempting to slay and looting everything you see in sight using bandages to survive. Especially zombies as they provide good gold, easy to kill, and don't do much damage. Plus, you'll receive 1,000 gold once you've killed about 10 of them for completing the Bones To Pick Achievement. Your goal is to obtain roughly 1,700 gold total so you have enough money to train musicianship, provocation, tactics, and to get a horse. Avoid Murderer NPCs and ghouls if possible for now.
Kite monsters using your bow and use bandages on yourself once you’ve been damaged to attempt to heal yourself. After a few seconds you’ll be healed a set amount; however, be cautious as your bandages will tend to fail at a low skill level and you could heal less if a creature hits you while you are applying bandages.
If you're running low on arrows, you can attempt to rebuy more at the Bowyer but your best bet is to kill Skeleton Archers and Ratmen Archers as well as Centaurs to loot arrows.
Once you’ve gained at 1.7k in gold and loot, head to the bard in Britain to train musicianship and provocation to 50 and purchase a few lutes. The bards are located right next to the Blacksmith you visited earlier. Single left click on the bard to see the training and purchasing options. Provocation will make your life easier as you can provoke monsters onto each other and avoid damage.
-
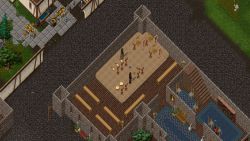
Britain Bard

Let’s get you a ride. Head over to the Animal Trainer in Lord British's Castle and purchase a horse for 550gp. This will make traveling around much faster. The Castle is located just north of the Britain Bank.
-
Britain Animal Tamer

If you have any remaining gold, you could train other useful skills such as Anatomy/Tactics from the Blacksmith or purchase more bandages or heal potions from an Alchemist. Now it's time to head back to the Young Dungeon and continue clearing it. The goal now is to gain skill, gold, and getting more comfortable with PvM in general. Be mindful of how much you loot as you’ll walk/be unable to move if you’re carrying too much weight. Use the telepads to get safely back to the Young Dungeon entrance.
Be sure to complete the Vengeance quest so you can obtain the Ring of Forgiveness. This ring allows you to teleport back to the Britain healer if you're killed once every 12 hours.
Once you’re able to easily clear the Young Dungeon, head back to Britain and train any skills from the Final Build listed above to 50 if they are not already at that skill level. It’s time to prepare for your first REAL dungeon!
Preparing for the Dungeon Despise
It’s time to put your big boy/girl pants on and head out into Sosaria. We recommend your first real dungeon to be Despise as it is easily accessible since it is north of Britain.
-
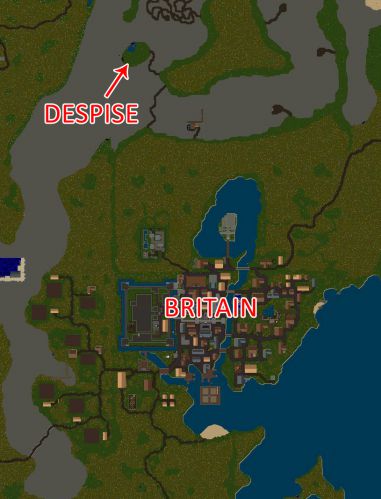
Despise Location

Upgrading Your Bow
The beginner bow is underwhelming to say the least. It's slow and misses a lot. We strongly recommend you upgrade your bow for a better overall playing experience. You'll want to get a composite bow and ideally an accuracy modifier attached to it. These bows can be purchased from players.
- Accurate
- Surpassingly Accurate
- Eminently Accurate
- Exceedingly Accurate
- Supremely Accurate
For a full list of weapon modifiers you can visit the Weapon Modifiers page.
Obtaining the Spell Mark
Even though Despise is nearby, running back and forth from Britain and Despise can be tedious so you’ll want to obtain the spell Mark.
Mark is 6th circle spell you cast on runes (purchased from Mages) which marks your location. You will teleport to the marked located when you cast the spell Recall on the rune.
You’ll want to mark multiple runes to Britain bank as well as the entrance to Despise. Keep one of each on you and put the rest in your bank. You mark several runes incase you die and lose your runes. Since you only have 50 magery, you’ll want to purchase some Mark Scrolls as it significantly increases your chance to successfully cast the spell. Without scrolls, at 50 magery, you’ll unsuccessfully cast (fizzle) so much it will be frustrating.
Here are your options for obtaining Mark:
- You can purchase the scrolls from players or vendors
- You can ask players or Companion for help and they’ll most likely give them to you (join our Discord for the quickest)
- You can create a new character (toon) with 50 inscription and magery and attempt to craft them yourself but this would be a similar experience to trying to cast the spell yourself
A side goal would be to obtain a Runebook where you can store your runes and not worry to lose them as your Runebook is blessed.
Skill Training
Some players choose to macro skills prior to setting out in the wild. While not necessary, its important to understand what macroing is to see if its the right fit for you.
Macroing
Macroing is automating skill gain for your character through scripts. It can be done through the Script tab of your Forever Client. While macroing is not required, - you can make great skill gains simply hunting in dungeons (50% skill gain increase) - it can be a convenient way to increase the power of your character prior to jumping into Despise. Or people choose to macro simply because they have other obligations and want to build their character while away from the computer. Many skills are legal to macro unattended but please review the rules (https://www.uoforever.com/rules.php) to understand which ones you cannot do unattended. All skills from the Final Skill Build can be done unattended.
Some skills are free to macro (such as Anatomy), but other takes resources (Magery) which costs gold or can be more complicated as you’ll need a partner or multi-client (Combat Skills and Healing).
You’ll hear the term “multi-account” and that simply means you can have two or three clients open on the same computer. This is done for a number of reasons but for this guide’s purpose you would use it help macro your character.
Macroing Guide
Here is how efficiently macro each of the Final Build Skills for your Dexxer or Archer/Bard:
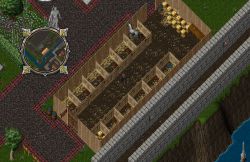
- Musicianship/Provocation - Visit the Bard's Table which is located just due south of the Young Dungeon entrance (pics below). Stand the table and provoke any monster onto yourself. This method is extremely efficient as you gain 50% skill gain within dungeons
-
Young Dungeon Bard's Table

- Magery - Follow the Magery macroing guide on the Magery wiki page. You'll want to macro Magery early or you'll run into skill cap problems. In order to macro Magery, you will also need Meditation to regen mana. Once you've completed macroing Magery, you can set Meditation's arrow down so the skill lowers as you creep closer to the skill cap.
- Anatomy - Run a script to use anatomy on a second player (multi-account). You will want this skill GM’d before you macro Healing.
- Healing - Kill your player on your second account and have your primary character attempt to resurrect your multi-account character. Do not accept the resurrection on the second account. You can macro this way fully from 50 to GM.
- Dexxer/Archery & Tactics - Multi account and run a script to attack each other than back off to heal when you’re low HP. It’s probably not worth macroing these skills as you’ll make great gains simply hunting - especially in dungeons.
Gearing Up
Whether you choose to macro or gain skill simply playing - its time to gear up for our venture to Despise. Head back to the Young Dungeon or Britain Graveyard to gain gold if you’re running low to purchase these supplies.
- Full set of plate armor (if dexxer?) (NEED RECOMMENDATION HERE)
- 6 Runes (3 marked for Britain with 2 in the bank. 3 runes brought with you to mark Despise)
- About 30-50 of each reagent
- Heal potions, refreshes, etc?
- 100 bandages
Make sure your Strength and Dex are 100 and Intelligence is 25.
Despise
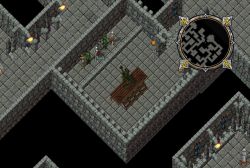
Now that you're trained and geared up, it's time to head to Despise. As mentioned before, it's located North of Britain.
Despise is a great beginner dungeon as the first two floors are not very difficult to solo. Check out the Despise wiki page for more detailed information.
The first two floors should be no problem if you're macroed. You need to be very careful once you begin the 3rd floor as the difficult of the monsters begin to ramp up. We would highly recommend not going beyond the 2nd floor unless you're in a party.
Just like in the Young Dungeon, use your provocation and combat skills to slay monsters and bandages/potions to survive. Be sure to have the spell Cure handy in case you are poisoned and you will want to cast Reactive Armor on yourself if you are a Dexxer as it will reflect damage.
Don't get too greedy with your loot if you no longer have your Young Player Status. At any time a Player Killer (PK) can come by and kill you for your loot. So, make a habit of regularly recalling out to bank your loot once you have a nice haul.
Next Steps
Once you're able to clear Despise easily, you've pretty much graduated from being a newbie PvMer - Congratulations! You now have a toon who is able to easily generate gold for your future builds such as a crafter, PKer, tamer, or Meta Talismans build. Or you can continue on your bard path and tackle more dungeons listed below.
We strongly recommend you join a guild for comradery, friendship, and be able to to start getting more involved in higher difficulty dungeons and fighting Champions (Champion Spawns).
Finally, as mentioned before, you should join Discord. It's an amazing resource to find friends, guilds, get questions answered quickly, and get the most up to date information from Staff.
PvM Location Guide
UO Forever is an open world and you are free to explore wherever you wish; however, some people appreciate a bit of guidance.
As a beginner, we recommend getting your footing in the Young Player Dungeon. Once you feel more comfortable with combat, we recommend you visit Despise as your first real dungeon but would not advise going beyond the 2nd floor unless you are with friends. From there, the world is your oyster but here is a handy chart to help give you some insight of the danger of each dungeon and floor.
We've categorized the chart by overall difficulty of the most common PvM locations. As a general rule, the first few floors of a dungeon should not extremely difficult but some locations get exponentially harder as you progress.
Dungeon Difficulty Chart
| Dungeon | Difficulty | Location |
|---|---|---|
| Ankh | Hard | Marble Island |
| Asylum | Hard | Center of the Britain Hedge Maze |
| Booty Island Dungeon | Intermediate | Booty Island |
| Britain Sewers | Beginner | Britain |
| Covetous | Intermediate | South of Minoc, west of Vesper, and northwest of Cove |
| Deceit | Intermediate | Dagger Island |
| Delucia Passageway | Intermediate | Southwest of Trinsic |
| Despise | Beginner | North of Britain |
| Destard | Hard | Southeast of Skara Brae and northwest of Trinsic. |
| Exodus | Hard | Yew |
| Fire Dungeon | Intermediate | Serpent's Hold |
| Grinch's Grotto | Intermediate | Hythloth |
| Hythloth | Intermediate | Fire Island |
| Ice Dungeon | Intermediate | Northwest of Wrong |
| Khaldun | Hard | Southwest of Trinsic. |
| Montor | Hard | Vesper graveyard |
| Orc Mines | Beginner | Northwest of Britain, southeast of Yew |
| Shame | Intermediate | South of Yew, north of Skara Brae, west of Britain |
| Spider Cave | Intermediate | Southwest of Shame, south of Yew, north of Skara Brae, west of Britain, and west of Orc Mines |
| Terathan Keep | Intermediate | Spider Cave |
| The Abyss | Intermediate | Fire Island |
| The Grotto | Intermediate | Middle of the ocean, west of Ocllo |
| Wind | Intermediate | North of Britain |
| Wrong | Intermediate | Northwest of Minoc |
| Young Player Dungeon | Beginner | Britain |
Additional Revenue Options
Using one of the Recommended Builds will set you up nicely to generate consistent income; however, if you would like to switch things up a bit, here are a few options to continue exploring Sosaria while gaining some income.
Escorting
Escorting is a simple way to gain gold by escorting NPCs found in major towns to other towns or dungeons. You can travel by foot or magic using gate travel. There isn't a specific build for escorting as you could do them while PvMing or Treasure Hunting so think of it as an add on option to your gold generating build. Check out the Escorts page for more information.
Tips
1. To keep the lights on always, you don't need to cast the night sight spell or use potions. Go to Razor, Filters and Check Lights.
2. Don't go gray opening a corpse you don't have looting rights to! Open paperdoll. Go to the pentagram on top. Go to the UO symbol. Second column, check “Disable Open Innocent Corpses.”
3. To recall somewhere quickly, make a rune for Home or a Bank. Type [recall Home (or whatever your named your rune).
4. Watch others play on Twitch! We have many streamers who are willing to answer questions and watching others is a great way to learn the game. Look in the #streamers thread on Discord for who is streaming UOF.
5. Join Discord and the UOF Forums. There you will have a whole community to help you. Visit UOF's homepage to join. https://www.uoforever.com/.
6. If you wish to end your young status early (which is not recommended), simply use the phrase "I wish to renounce my young player status". Be sure this is what you want to do as you cannot get young status back once it is renounced.